

Faça um candelabro de franjas, baphônico, pra sua sala, quarto...
Eu sempre quis saber como se faziam aqueles candelabros enoooormes e lindos pra pendurar bem no meio da sala. E eis que eu achei um DIY bapho, lá no ótimo THE SWEETEST OCASION...o DIY está em inglês, mas é super fácil de entender só de olhar as imagens. Pra qualquer coisa, sempre rola o google tradutor...né?
Hello again, lovelies! It’s me, Jenny from Hank + Hunt and like most everyone these days my heart is infatuated with fringe. I love it any and everywhere and whipped up this little chandelier out of fringe trim you can get at your local upholstery or yardage shop. I found some really long fringe and it works perfectly for party decor or would also be cute around home!

Supplies -
Hot glue
4 yards of fringe, found in the trim section, I used 8” length
2 embroidery hoops
acrylic paint
clear fishing line
Hot glue
4 yards of fringe, found in the trim section, I used 8” length
2 embroidery hoops
acrylic paint
clear fishing line

Separate the inner and outer hoops. Paint the inner hoops white (or color of fringe) and let dry.
Cut 3 pieces of fishing line about 18” long. Tie each to a hoop, evenly spaced around the hoop.

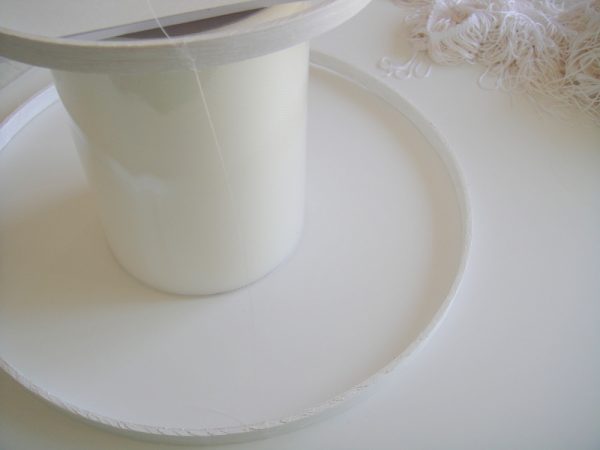
Either set the hoops together, the smaller hoop higher (5-7 inches) and propped on something, or get a helper to hold both hoops. Note: I highly recommend getting help, so one person can hold the hoops in position and one can tie the fishing line. It is important that the line is tied with even spacing and length; the smaller hoop should be centered and lower than the larger hoop, but also slightly overlapped by the length of the fringe. As for the fishing line, you will not use all 18”; it is just easier to tie if you have a little extra.
Now, cut 3 more pieces of fishing line, about 20 – 25 inches long. Tie each, like before, to the large hoop. (You will finish this after adhering fringe.)
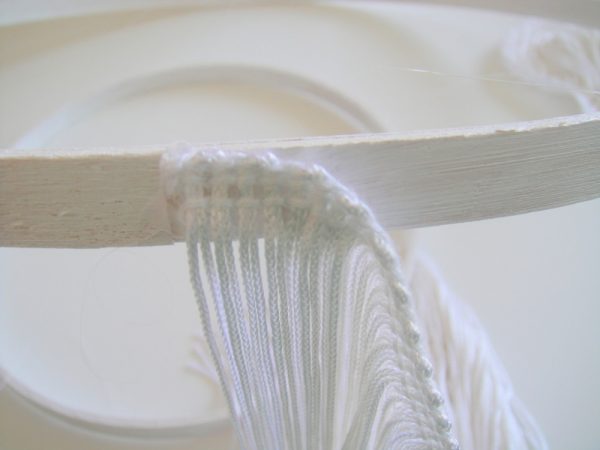
Place a larger bead of hot glue on the hoop. Line up the top of the fringe and press the end of the fringe into it and hold until cool.
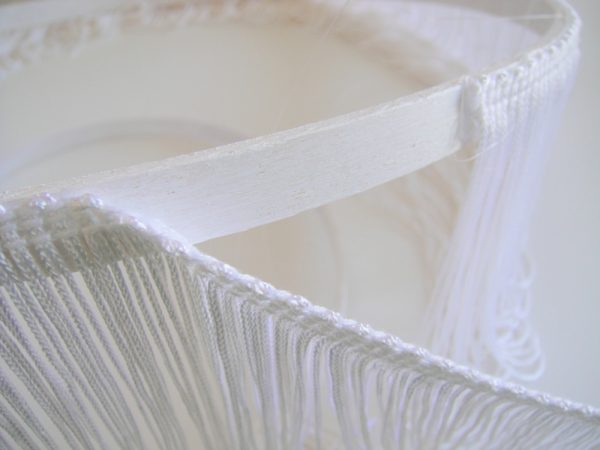
Continue around the hoop, being careful to line up the top edges. I doubled up, and went around each hoop twice. Once you reach the starting spot, trim, and tuck the end under and glue down with hot glue. Be careful not to hot glue any of the fishing line! (don’t ask me how I know)
Repeat with the second hoop.
Now, take those three pieces of fishing line (from step 5) and holding all three together, tie in a knot twice, while holding up the chandelier by the lines, to make one large knot directly centered and evenly spaced above the hoops.
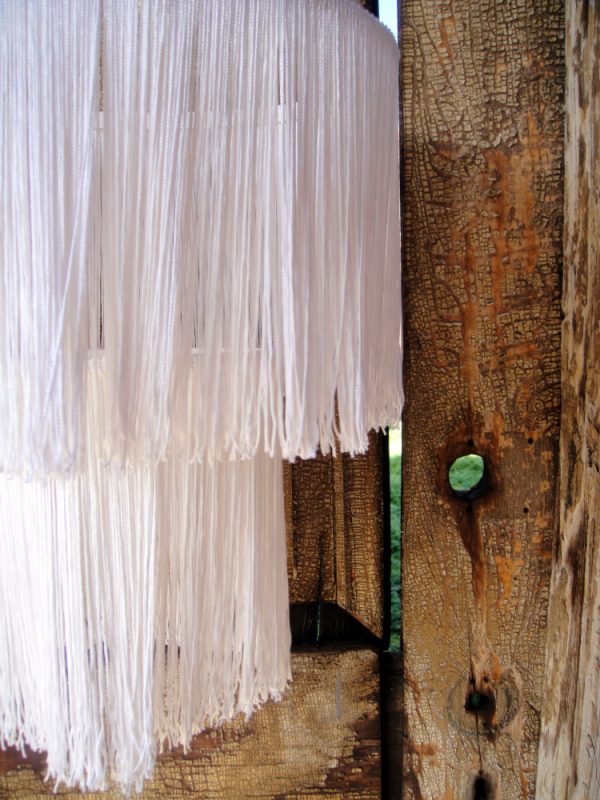
And, voila! A super cute and even more budget-friendly chandelier for your next celebration. Enjoy!
{Photos by Hank + Hunt.}

0 comentários:
Postar um comentário
Ola! Seu comentario é muito importante para que o blog cresça cada dia mais! Muito obrigada!!!! Qualquer dúvida, envie um email que a gente responde, ok?