

Uma Pulseira com nó de Marinheiro: BAPHOOOOOOOOOOOOOOO.
Oi, gentes! Olhem que liiiiiiiiiiiiiiiiiiiiiiiiiiiiiiiiiiiiiiiiiiiiiiiiinda essa pulseira com nó de marinheiro...Não vou dizer que é um barbadão fazer, mas neh? Dá pra tentar, num dá? Eu acho. E vou tentar. Depois eu mostro. Lá do site mais amor Love Maegan.
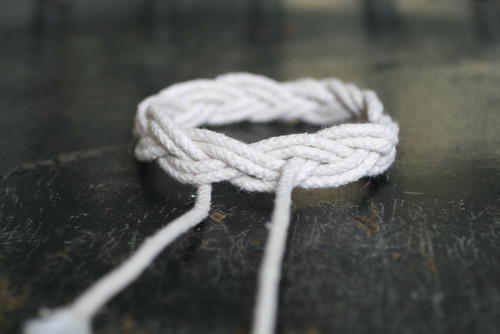
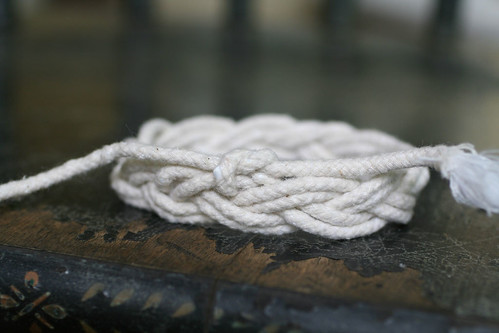
Dip Dyed Nautical Rope Bracelets DIY

Perusing Lonny Magazine last week, I spied these adorable dip-dyed braided rope bracelets by Tanya Aguiniga retailing for $85 and thought, really, what an easy DIY this has to have been done already. And sure enough, it has!! It's not often I post other people's content but this was so great I had to share. So, without further ado, I give you Sailor's Knot Bracelets via Etsy's How-Tuesday. Check out The {NewNew} for more diys like this.

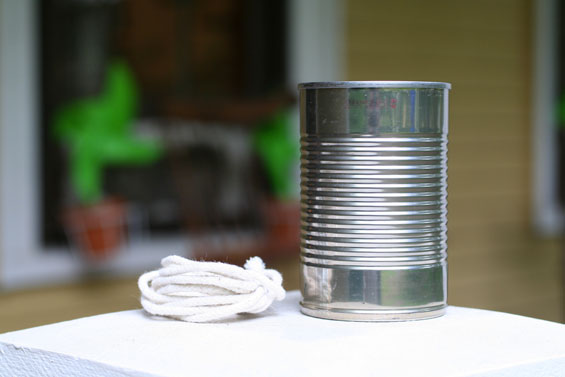
* 3.5 yards of rope.
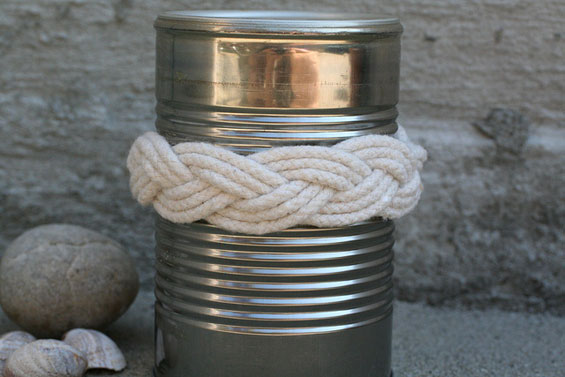
* 14 ounce can for a smaller bracelet or a 20 ounce can for a larger bracelet. Any other round object that has the appropriate circumference for your wrist will do.

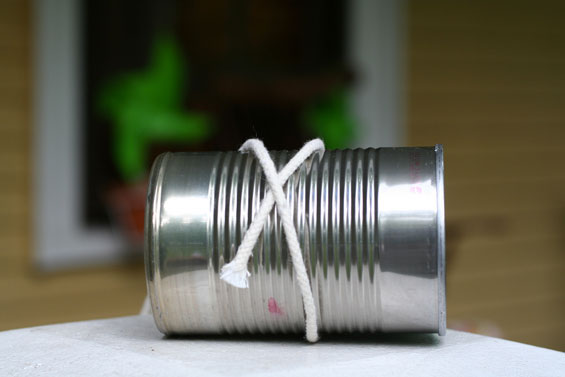
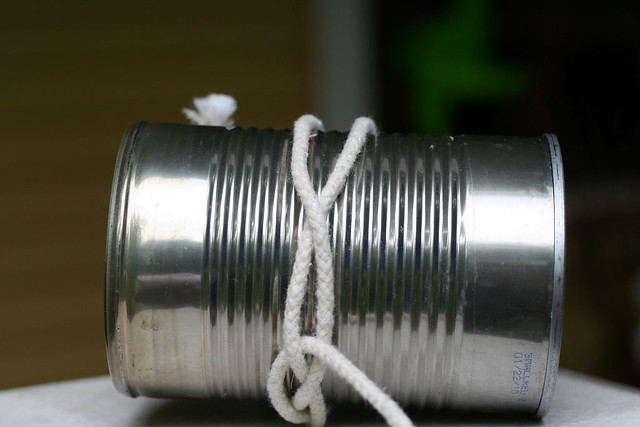
* Wrap one end of the rope around the can to shape an X. Leave about a 4" tail. You will need this tail at the end to finish the bracelet.

*Wrap the long end of the rope around the can again and bring it up to the middle of the X. Then pass the long end under the right, upper leg of the X and pull the long end all the way through.
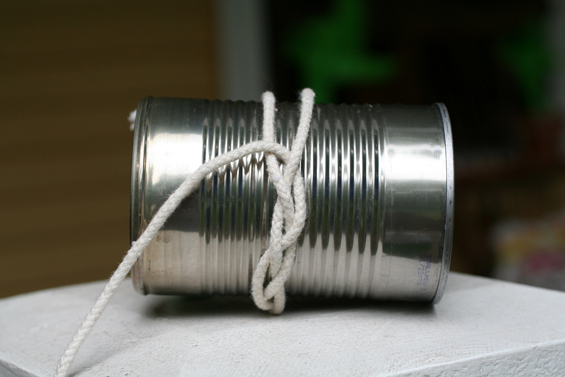
* Next, move the upper left leg of the X over the right leg of the X to create an oval shape.
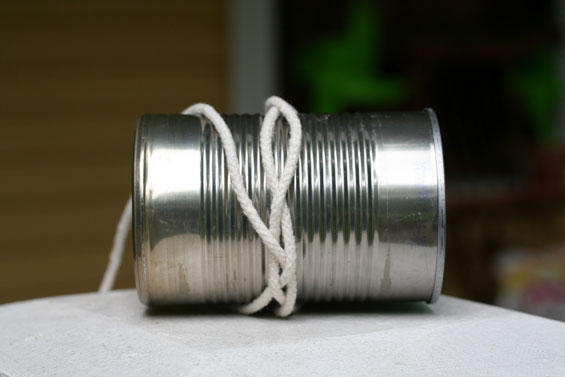
* Pull the long end of the rope through the oval shaped opening you just set up.
* Turn the can a bit and you will see that the oval shape has created another X shape. Again, pass the long end of the rope under the right upper leg of the X and pull the end through.
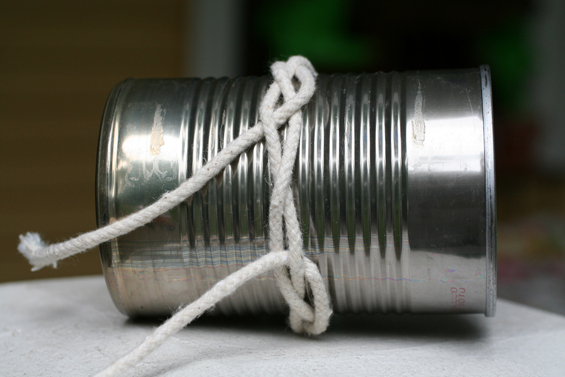
* Repeat steps 3 through 5 until you get to the beginning of your project.
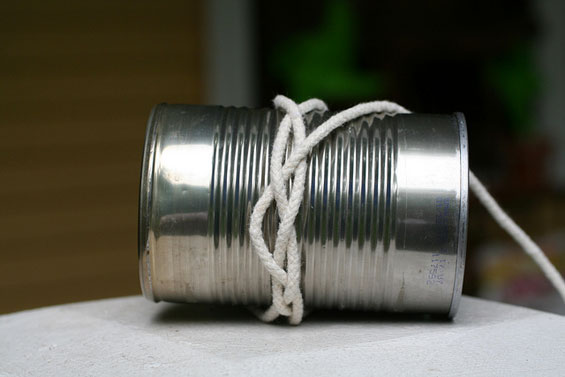
* You will now find a three-stranded braid. Follow the rope you initially laid out and create a parallel second line.
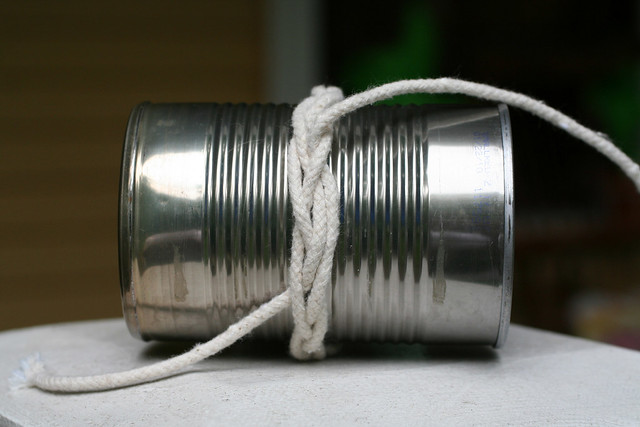
* Continue around the can. If you find that it's getting too tight to pass the twine through the openings, you may want to take the bracelet off the can and continue with the knotting in your hand. If you take it off, be careful not to pull the rope too tight, otherwise your bracelet will shrink on your wrist.

* Confused? Watch This or This

* My Notes *
* To really mimic the ones featured in Lonny, you may need a slightly thicker rope & a smaller can. Also, use This tutorial.
* To create the dip-dye and/or even an ombre effect, grab yourself some RIT dye, follow the instructions and just literally dip your bracelet half-way in the dye mix until you get the color you want. To achieve the ombre look, start your dip quick, in and out, then dip again a bit longer and lower down ...and so on, and so forth.
* These would also make really adorable NAPKIN HOLDERS ...so use a really narrow jar or maybe a toilet paper roll to make a smaller version.
* Instead of tying a knot inside, you can also hand-stitch it with a matching thread to make it flush

Aaa..que lindinhaaaaaa...Vou tentar fazer...rs...será que vai prestar?...rs....Se der certo eu te mostro o resultado....
ResponderExcluirbju
http://danillamarques.blogspot.com/
seu blog é tuuuuuuuudo de bom, eu adorei *-*
ResponderExcluirto seuindo, beeijos flor
www.pinup-pos-moderna.blogspot.com